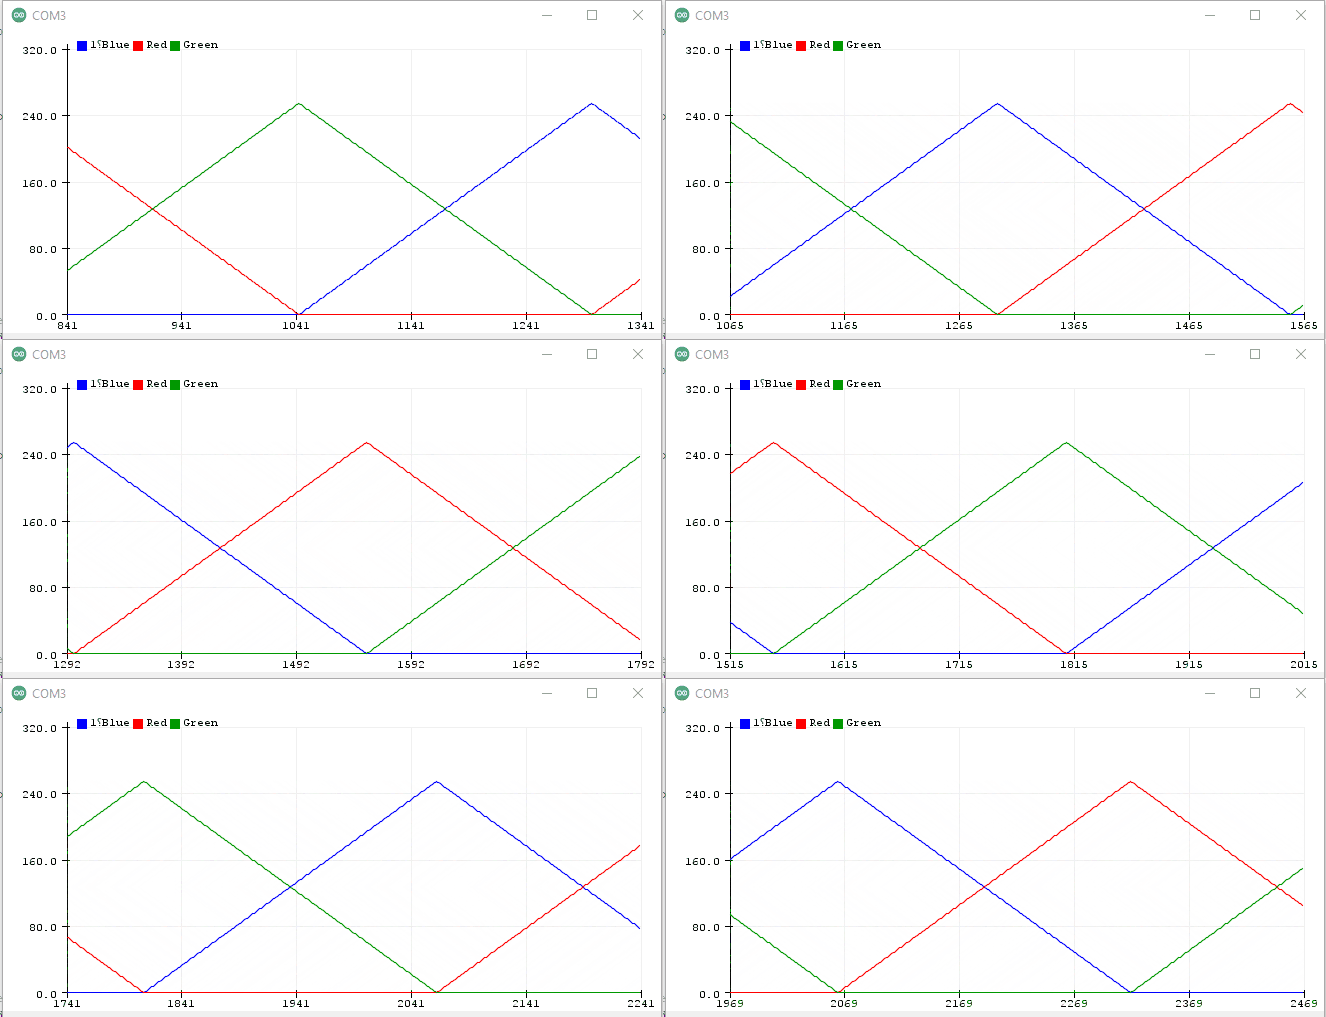
Here’s a straight-forward circuit with a LED light that’s controlled by my code downloaded to an Arduino controller’s chip running the “light show”. It starts with red color of LED set to max RGB(255,0,0)…then slowly dims the red as green value is increased incrementally to max. Then green is dimmed while blue is increased incrementally to max. The code is in C/C++ for Arduino IDE. Connection via USB:A-B. LED is four-pronged. So 3 resistors used. The values are increased/reduced in loops and then plotted to show the patterns.
Each of RGB parameters are graphed (their RGB values are on y-axis and the analog returned values from the 3 pins are in x-axis. We can clearly see when Red is at maximum, Green starts to rise until its maximum, at which point Blue starts to rise to maximum…and the cycle continues forever.

So, above is the software side of output. The hardware output is shown in my amateur video below. Although it’s hard to see all the incredible in-between colors from the video (it was recorded by a phone), in real-life they’re beautiful!
In the future, I will post some more fun projects with my Arduino board as I experiment more. I will tag them so you can always see the full list of blog posts related to that by visiting this URL: https://flyingsalmon.net/?tag=Arduino
Enjoy!
Interested in creating programmable, cool electronic gadgets? Give my newest book on Arduino a try: Hello Arduino! 
▛Interested in creating programmable, cool electronic gadgets? Give my newest book on Arduino a try: Hello Arduino!
▟