Howdy, today I continue the discussion on designing fun web applications using MIT’s Scratch platform. In my earlier blog about Scratch piano playing game, I mentioned how Scratch apps that listen for keystrokes only won’t work on smartphones and touchscreen only devices and that Scratch platform does not support Buttons or touchscreen natively, so it poses some problems.
There’s a way around it, but it still causes issues as they’re not system events and I don’t see how its web application’s sprite or object can tackle those events as the triggered events won’t trickle up as a system event would, and there’s no global way to access those that I could find. So, today we’ll look at my solution to simulating buttons in this program titled “Let’s Dance! (Touch-screen+Custom Buttons)“; available to play here: https://scratch.mit.edu/projects/279591241/
Try it! The audio, video, and touch commands all work perfectly with touch on this version; on any device that runs a modern browser. Also, I simulate the graphics and behavior of buttons that had to be created manually (buttons don’t exist in Scratch as we know it). Nevertheless it was a lot of fun, reminded me of the old days when we had to create cool-looking custom buttons for Windows applications from scratch!
In-Game Video Capture:
Here’s a quick-and-dirty short clip of how it plays. https://youtu.be/f0NY2nj3sQg
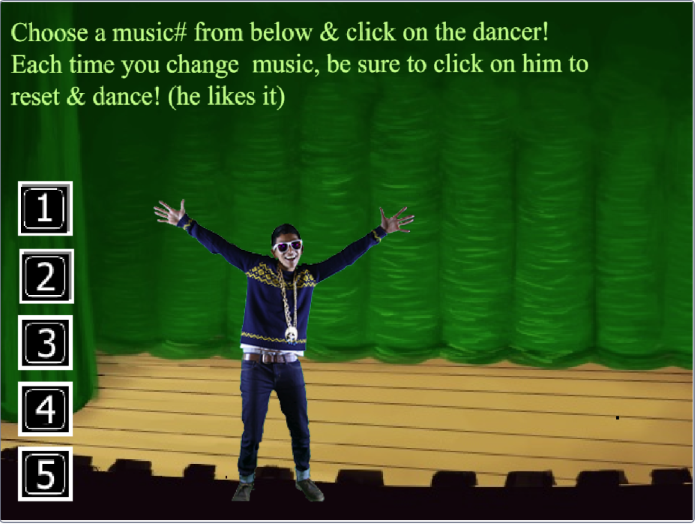
Screenshot:
The Basics
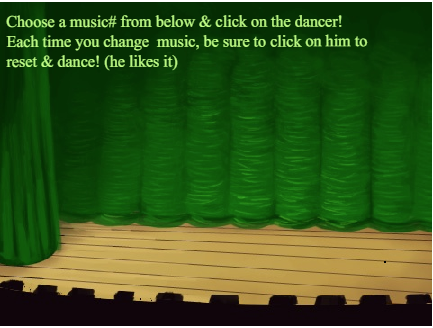
First, let’s get the basics out of the way. I use an image (below) as the backdrop. I converted to a Vector image for scaling purposes but you don’t have to. On it, overlaid some with text elements using the Scratch IDE. The buttons are NOT part of the backdrop as they have to be a bit more “intelligent”. We’ll come to that later.
Sprite & Costumes: The dancer has 11 images (aka costumes) in his sprite. Some at first glance seem to be identical but they’re not. To save time and energy, instead of recreating more images from scratch, I used costume #4 to generate #5 but modifying its horizontal position (so it appears that the dancer does a little moonwalk move). The full set is shown below:
![]()
Now let’s talk about the core purpose of this exercise…creating the buttons that act more and less like buttons would! But without having real buttons at our disposal.
Creating Custom Buttons (Faking It!):
There are 5 buttons I created in a paint editing program (e.g. MS Paint) using simply digits as their faces (you could just as easily add images instead of text on top as needed). They’re labelled 1 through 5. At minimal, I wanted 2 states: Up state (when button is not pressed), and Down state (when it’s pressed). Now I could easily do away with Down state, and call the functions whenever the button at Up state is pressed/clicked, but there would be no visual cues to the user that it was pressed. So, I added the Down state image. (In more professional settings, we would add 1 or 2 more states and images to make the buttons act really smoothly…e.g. highlight, drag, etc.).
So, the button for 1 has these images for Up state and pressed state respectively: ![]() and
and ![]() . If you’re very observant, you’ll notice that the Down state image is not just a color change but the image is shifted by a couple of pixels giving the impression of a 3D object being pushed inward.
. If you’re very observant, you’ll notice that the Down state image is not just a color change but the image is shifted by a couple of pixels giving the impression of a 3D object being pushed inward.
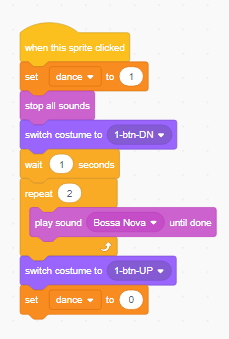
Then I repeat the same process for the required buttons. Then the trick is to understand that they’re NOT buttons, just images. So, images and sprites can be clicked on in Scratch and interacted with. Therefore, we use these as sprites and handle the clicks/touch on them! When a button is in Up state and it’s pressed/clicked, I do the necessary functions to process the user-command…i.e. in this case, we play a music loop. But also, visually, I replace the button’s image to Down state’s sprite as shown above. Then to keep things clean, I change the button’s Down state image back to Up state image after the music has finished playing. Here’s the block for that…
Code for a single button handler: