This is another version (improved with GUI and better error handling) of a weather app in Python that shows weather and related information of any city in the world. This uses tkinter library for GUI and its grid system for precise layout.
The Web Service
We’ll use openweathermap.org’s web service, which is free. It requires an API key, which you have to get individually. This is an extension of the previous, shell-version. The API calls, the webservice set up and usage are the same. For more details on those, see my previous post below:
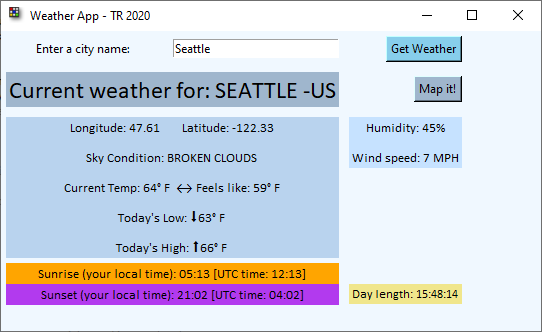
As in the previous version we get back the same JSON payload and parse: location info (latitude, longitude), country info (because same city name can exist in different countries), simple description of weather, specific high-low temperatures, “feels-like” temperature with windchill factored in, sunrise and sunset times, humidity, wind speed. Additionally, I show length of the day based on sunrise and sunset values.
Explanation
The full source code is posted in my previous blog linked above and below but I wanted to call out a few things that’s different in this version. The JSON payload is the same as before:

Some of the things that this version of the code demonstrates are:
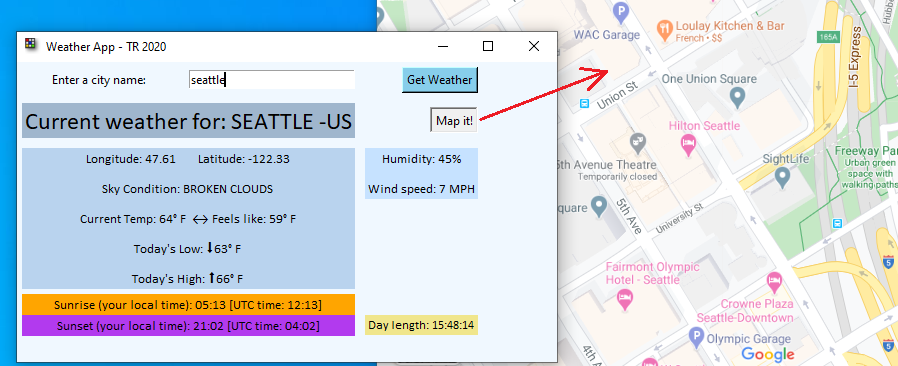
- How to enable/disable a button dynamically (Map It btn)
- exception-handling Window and widgets’ custom background color
- Widgets such as buttons, labels, input box (Entry), and Messagebox dialog
- And most importantly (from GUI perspective), usage of grid method of tkinter.
In my earlier GUI application for Air Quality, we used place methods which is a more accurate version of pack. Grid method enables us to have even finer layout control.
We have a Map it! button to open your default browser and show the map of the city.
If the city is not found or there’s any error in input, we catch in try-except block gracefully; and a message box will appear with the error allowing you to continue the application after OK is pressed.
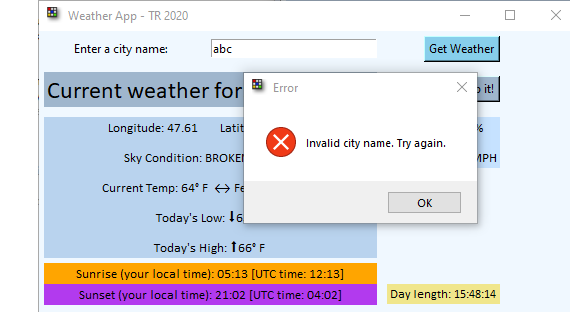
This is achieved by the following lines:
from tkinter import messagebox
messagebox.showerror("Error", "Invalid city name. Try again.")
--- it's in the exception part of the try-exception block (aka try-catch block in C/C++/other programming languages).
My custom function to check and act on enabling/disabling a button is done as follows:
def checkMapBtnState():
  if (g_LAT==0 and g_LON==0):
      mapButton["state"] = DISABLED
 else:
      mapButton["state"] = NORMAL
checkMapBtnState() is called from my custom callAPI() which makes the actual webservice call and parses the json result (that part is the same as the previous weather app linked from here so I won’t repeat).
The main header label code will give you an idea of how all the rest of the grid system works and how to set custom formatting on them:
my_label = Label(root, text=s, textvariable=s, font=("Calibri", 18), bg="SlateGray3") # for city and country header
my_label.grid(column=0, row=1, padx=5, pady=5, columnspan=2, sticky=E)
The grid system is composed of rows and columns (not visible) for our window as we like starting with 0 as in an array. First row is row# 0, first column number is 0 and so on. The attribute columnspan is same as in HTML. The bg attribute is for background and it can take hex values or friendly names as in CSS/HTML. For more details on grid() method, search for it online…I’m only demonstrating some of its capabilities here.
The main block calls my custom functions: makeurl(var string cityname) and callAPI(). Get button invokes another custom function updatecity(), which in turns call makeurl() and callAPI() everytime…so they’re called each time Get button is pressed to retrieve the latest city input in the entry box.
The custom function cityinfo() is called when Map it! button is pressed. Its job is to use the retrieved latitude and longitude values for the most recently searched city, convert to them string (they’re returned as float type in json) and construct the full URI for Google Maps, then to navigate your browser to that URI.
I’m also rounding the temperature values returned (which are floats and with 2 decimal precision), then using Unicode can represent a degree symbol and an up/down arrow as well, as in the line of code below:
s = "Today's Low: \u2B07" + str(round(r['main']['temp_min'])) + '\u00b0 F'
The Execution
Here’s a quick clip of the basic workings of the app including error handling and mapping.
Source Code
For more detailed description of the core application and fundamental source code, see the original post below.
Because of the UI controls’ logic, the code for this particular version is about 190 lines and I won’t be sharing the entire code here but feel free contact me if you need it (link at bottom of the post).
If you like more info or actual source file to learn/use, contact me via this form or directly by emailing me at trseattle at outlook dot com. To support this voluntary work, you can also donate via the Home page.